
Buying Guide: How to Choose Walk-in Cooler/Freezer Combination Boxes for Your Foodservice Establishment
Size/Capacity
Walk-in coolers tend to be larger than their freezer counterparts and can occupy a space from 15 cubic feet to as large as 400,000 square feet! Keep the following in mind when choosing the size/capacity of your walk-in box:
- Fresh vs Frozen Food Use: The size of your restaurant, overall volume, and menu selection will help you determine how much stock you’ll rotate through and how much of it should be fresh.
- Do you purchase ingredients in bulk? If you plan to purchase most items in bulk or do not live in an area that receives many deliveries, you may find that you’ll freeze items more often and, thus, will want a larger walk-in cooler and/or freezer.
- Do you want to offer catering or banquet-style options? If so, then you’ll probably need more space for bulk foods in your walk-in.
A good guideline to remember is that 1 cubic foot of open storage area accommodates approximately 28 pounds of solid food. But not every sq. foot in a walk in is useable. Accounting for airflow, aisle space, and shelving or dunnage rack configuration, you will likely utilize only 60-70% of the space.
Panel types
Insulation Type
With an R-value of R2-R5 per square inch, it takes about 8 inches of XEPS to equal the R-value of Foamed-in-Place Polyurethane counterparts. Thus, you will likely need a larger compressor to accommodate for the decrease in efficiency in a XEPS-insulated walk-in unit. While this unit may be cheaper up front, the increased cost of utilities will likely set you back in the long-run.
Foamed-in-Place Polyurethane
By pouring insulation between the two metal skins, foamed-in-place polyurethane is made. This option has a high R-value of R8 per square inch, and while it has a lower R-value retention, the end result is still better insulation and R-value properties than XEPS. This option has the best moisture resistance and best fire resistance as well with a melting point of around 700 degrees Fahrenheit.
Laminated or Slab Panels
This type uses glued insulation to metal skins, using the same polyurethane as foamed-in-place insulation as the bonding agent. While delamination may occur, this is mostly due to faulty manufacturing processes and is mostly a thing of the past.
The wall, floor, and ceiling panels are insulated to maintain the internal temperature of your walk-in, and most manufacturers use foamed-in-place urethane as opposed to laminating the metal on polystyrene. While this is less expensive, it’s also less efficient.
Flooring
The ideal setup is an insulated floor on top of an insulated concrete slab, quarry tile, and grout, and topped with a thermal break. Local codes may also play a role in how your walk-in is constructed. Some purchase a floorless box and simply place it on a finished floor. While this is a low-cost option, the yearly energy costs will be higher. This cannot work with a freezer as the cold temperature can crack the floor if it is not insulated.
If heavy-loaded carts and heavy shelving units will be utilized in your walk-in unit, then you may want to consider reinforced or structural floors, especially for high-traffic areas. For walk-ins with floor panels, interior or exterior floor ramps can provide easier access.
Other options include placing insulation under concrete and then placing the box on top where the floor can then be tiled. Another interior floor option includes placing commercial vinyl flooring into the box. In either case, be sure that the floor edges and corners are rounded to meet NSF standards.
Finishes
Galvalume
This combination of an aluminum coating over galvanized steel is popular today. It’s more corrosion-resistant than galvanized and more dent-resistant than aluminum. Comes in a minimum of 26 gauge thickness.
Galvanized Steel
Galvanized steel can more easily degrade and expose the steel to rust. G90 is the minimum galvanizing for walk-in units and is strong and more dent-resistant than aluminum. G90 is usually provided in 26-gauge minimum thickness for walls and ceilings and a 16-20 gauge thickness for floors, but keep in mind that galvanized floors are not NSF approved unless quarry tile is installed over the floor before use.
Painted Galvanized
More expensive than galvalume, it’s also more corrosion-resistant and gives users the option for different colors.
Aluminum
Corrosion-resistant but not as durable as other materials so it needs to be thicker. It’s usually provided in 40-60 millimeter thickness for walls and ceilings and 100-120 millimeter thickness for floors, while some aluminum floors are 1/8th-inch thick and diamond tread-plate embossed to add further strength.
Stainless Steel
The strongest and least corrosive of all the metal material compositions for walk-ins, stainless steel is also the most expensive. This usually comes in 24 gauge thickness.
Refrigeration systems
Pre-Fabricated Models
The simplest walk-in unit is typically a prefabricated model. Assembled either at the manufacturer or on-site, these models have a drop-in refrigeration unit that requires little setup and no costly technician! These start at 5 foot by 5 foot and increase by 1-foot increments, but what you gain in simplicity, you’ll lack in customization. Also, you will need to hire an electrician as these don’t simply ‘plugin’ but rather need to be hard wired.
Custom Fabrication
Custom fabrication allows operators to get a walk-in unit that is designed specifically for their needs and kitchen space. Keep in mind that while these may be a costly investment at first, the costs over time in increased efficiency can nullify the affordability argument.
Similarly, the assembly of your unit can come in two versions as well:
Pre-Assembled
Structures arrive at the site typically on a gooseneck truck and, depending on size and customer preference, lifted into place by crane, boom-lift, or forklift. No field installation is necessary.
Best for new restaurants in the process of being built, large door openings/small walk-in units, outdoor units.
Assemble On-Site
While installation is more costly, this option is sometimes essential for existing restaurants that can’t fit the entirety of a unit through doorways.
Best for existing restaurants, large Walk-Ins.
Refrigeration System
Top Mount
These self-contained refrigeration systems come with all parts, copper lines, and refrigeration gases completely installed. With these, the evaporator fans are inside the capsule pak system that mounts on top of a ceiling panel cutout.
Penthouse Refrigeration
Penthouse refrigeration is the same as top mount but doesn’t have the evaporator coil hanging down in the unit (keep in mind that these tend to be slightly more expensive, but the added space and efficiency could pay off over time). This system will need to be installed by a licensed technician.
Roll-Up Refrigeration
Similar to the penthouse, these systems simply roll up to the walk-in and are attached to the unit. Even though the evaporator coil is located outside the unit, it takes up shelf space inside the walk-in because shelving should not be installed in front of the unit. This system will need to be installed by a licensed technician.
Remote Systems
The condensing unit can be located outside of a warm room or even the building, allowing heat to stay outside rather than heating up the kitchen. These can be pre-assembled, but both standard and pre-assembled systems will need to be installed by a licensed technician.
Side Mount
Similar to top-mount, these systems are installed in one of the side wall panels and will need a condensation drain hose to be connected to a drain nearby. This system will also need to be installed by a licensed technician.
Saddle Mount
Completely pre-assembled, the system simply needs to be mounted to the side of a wall panel that has a hole cut for it. This is the same type of “plug and play” as the first unit mentioned. Easier to install doesn’t require too much height. But you will need to leave extra space inside the box available for the blower.
Many choose to purchase an overpowered compressor with the idea that their walk-in will have the power to spare. While the idea is logical, consider that your compressor will then have short cycles, costing your unit efficiency. The strain on your compressor kicking on and off constantly will shorten its life, and every owner is looking to get the most out of their unit!

Further Reading…
WIth the most storage capacity, walk-in refrigeration is best for restaurants with high-volume outputs and who have the space for a full walk-in unit. These are located in the receiving area and is situated in order to reduce traffic in the kitchen.
Most manufacturers take care of balancing the cooling unit for you, but you’ll want to ensure that components are correctly sized for your location as well. For instance, the refrigeration system of a walk-in unit in Florida will need to be larger than one in Maine because of the ambient temperature, and a compressor in the mountains of Colorado will need to larger than one in California due to the differences in elevation.
- Remember that walk-ins require at least 2 inches of space between the walk-in ceiling and building as well as a minimum of 1 inch on all sides for proper ventilation. Tight fits make for difficult installations.
- Always make sure that there is adequate fresh air available for the compressor and at least 8-10” of space unencumbered all around. Also, consider if it will be accessible to a repairman.
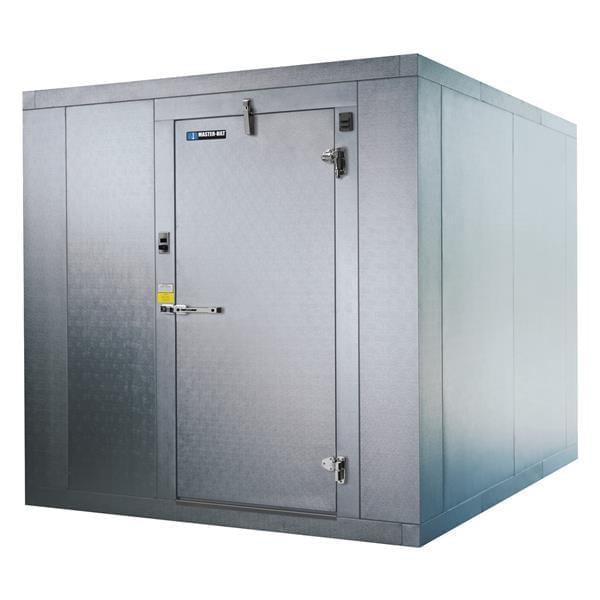
- Doors are the most used part of the walk-in box and should have a kick plate and a stainless front if possible.
- Air curtains and strip curtains will keep the cold from leaving the box and the heat from getting in. A worthy purchase that will soon pay for itself, especially if the box will be accessed often.