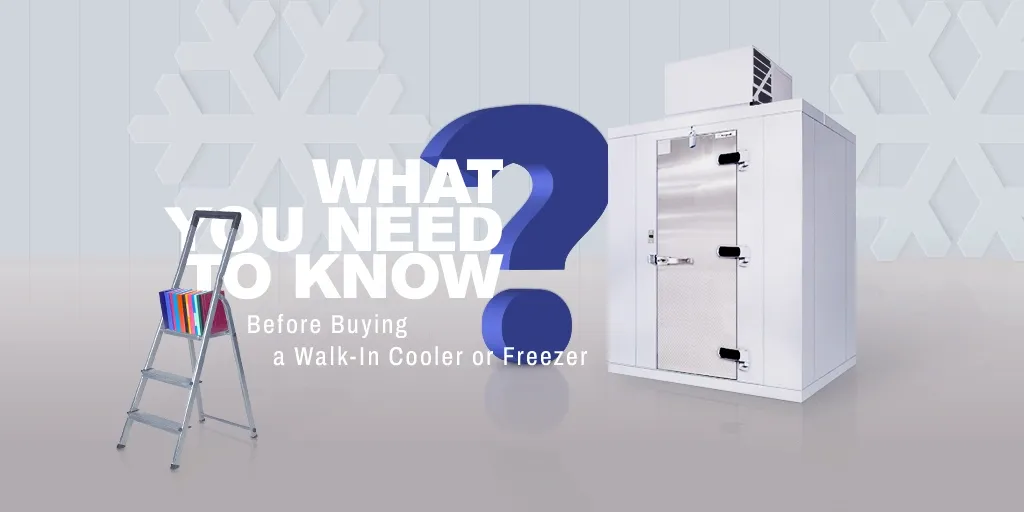
What You Need to Know Before Buying A Walk-In Cooler or Freezer
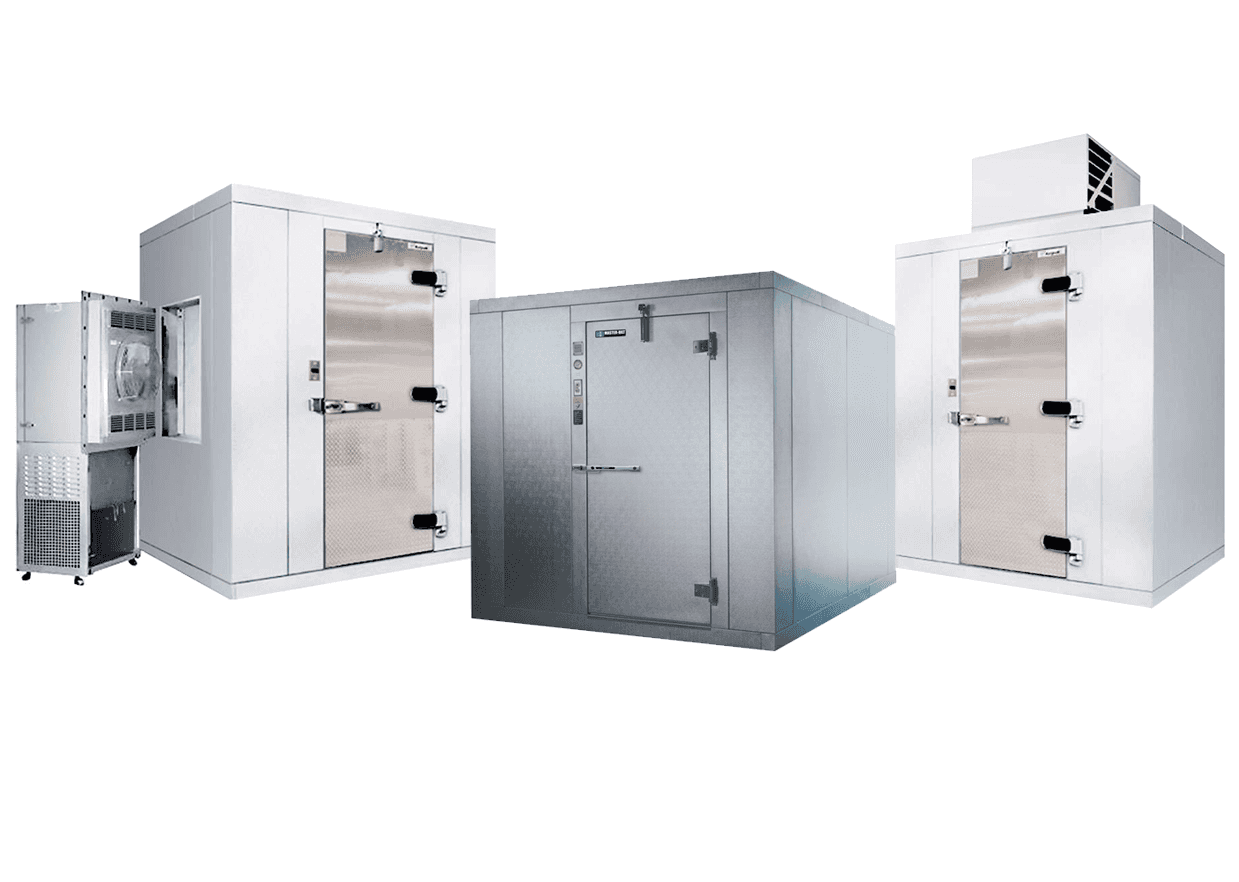
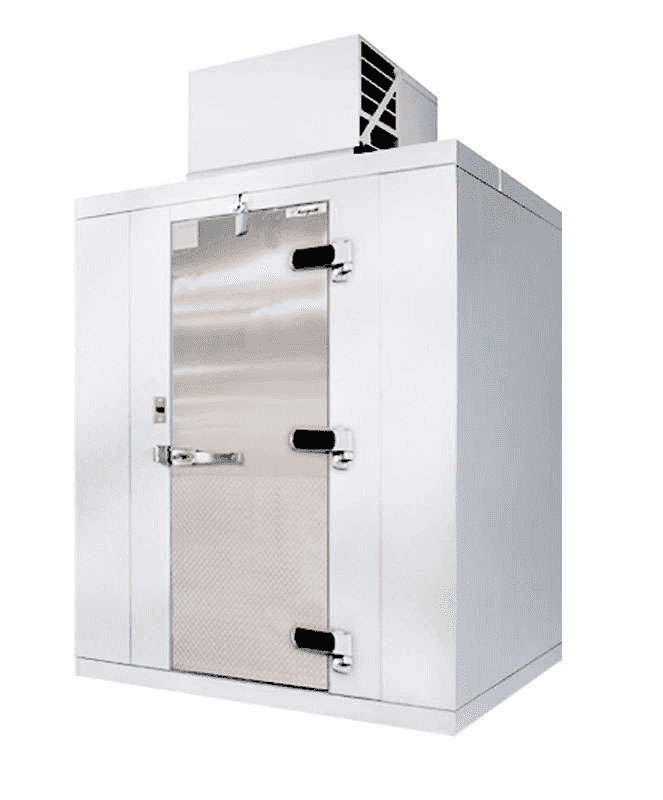
Foodservice establishments that need to produce at high volumes and have plenty of storage space for refrigerated and frozen items can benefit from investing in a walk-in refrigerator or freezer. Walk-in refrigerators and freezers are primarily used to keep product chilled or frozen and safely hold large quantities of both raw and cooked products to support daily production activities and preserve an inventory.
Walk-in refrigerators and freezers can go anywhere from 15’ x 15’ units to units that span hundreds of thousands in square feet, to provide generous amounts of refrigerated space for keeping your food items cold and fresh.
Because of their size and the delivery, installation, maintenance, and energy costs that come with such large units, you need to do adequate research before you lay money down for a walk-in refrigerator or freezer. This buying guide will help you choose the right walk-in unit for your establishment. We’ll discuss the types of walk-ins, the features you need to look for in a unit, and the factors you need to consider when choosing a specific walk-in.
Types of Walk-In Refrigerators and Freezers

1. Built-In Walk-Ins
Built-in walk-ins are made of heavily insulated walls with structural tiles covering the walls and floors. They can be made-to-order or designed with specifications that meet your exact needs. Because many manufacturers allow you to set your own dimensions so you can fit your walk-in into the space available in your kitchen, built-in walk-ins come in practically unlimited sizes.
This makes them the more popular choice for many foodservice establishments because they can be customized according to the real estate you have. It’s also for this reason that built-in walk-ins are very costly upfront, but their efficiency pays for themselves in the long run. The only downside to built-in walk-ins is they cannot be moved or changed easily as pre-fabricated units.
2. Pre-Fabricated Walk-Ins
Pre-fabricated walk-ins are simple, versatile units with urethane panels and drop-in refrigeration units. The smallest pre-fab walk-ins usually start at 5’ x 5’, with an additional 1’ increment for added space and you can go all the way to warehouse-sized units located outside and are even available as two-story structures.
Just about any pre-existing storage space can be converted into a walk-in cooler with foamed-in-place insulation panels and proper refrigeration components. Pre-fabs are either assembled at the manufacturer’s plant or on-site. They don’t require costly installation fees as built-in walk-ins but you do need to get in touch with an electrician to install the proper electrical wiring for it.
This type of walk-ins is usually slightly less durable than built-in units. There is also a limited number of sizes and configurations, which means you may have to move things around in your kitchen to accommodate a pre-fab unit. However, many models now allow for expansion so that it’s easy to add more cold storage space should you need it in the future.
Because they’re not built right into the structure of your operations, pre-fabs are also easier to relocate and expand if you need to. Installing, relocating, or expanding a pre-fab walk-in creates far less of a disruption to your business than doing the same to a built-in walk-in.
The Anatomy of A Walk-In
1. Insulation Type
The entire walk-in refrigerator or freezer is heavily insulated from floor to ceiling. This ensures that the cold temperatures of the interior stay the same, keeping your items cool, fresh, and safe. There are various types of insulation material used for walk-ins, which are classified according to their R-value. This refers to the material’s capacity to resist heat flow, or how much insulating power it has. A material with a higher R-value provides better insulation than low R-value materials.
a. Foamed-In-Place Polyurethane
Foamed-in-place polyurethane is sprayed between two metal panels that make up the sides and ceilings of walk-in units. This has an R-value of R8 per square inch, making it the most effective insulation among the most common materials available. It is also extremely moisture- and fire-resistant and has a high melting point of 700° F. The end result is powerful insulation that makes sure the cold air inside your walk-in is perfectly sealed in.
b. Extruded Polystyrene (XEPS)
XEPS has an R-value of R2 to R5, significantly lower than that of foamed-in-place polyurethane. Polystyrene insulated units are manufactured by simply laminating (gluing) the outer metal skin onto foam blocks which have been known to delaminate after time. It is more affordable upfront, but the decrease in efficiency means your walk-in refrigerator will need to work harder and consume more energy in the long run.
Most panels are mass-produced in standard sizes, normally 1', 2' and 4' in width, and heights of 7 1/2', 8 1/2' and 9 1/2'. It takes around 8” of XEPS to match the R-value of foamed-in-place polyurethane. You will also need a larger compressor to provide the extra power to run the refrigerator.
c. Laminated Panels
This type of insulation uses polyurethane slabs glued to the insides of the unit’s panels. The disadvantage of using laminated panels is that there may be a tendency for the insulation material to peel off from the metal panels.
2. Flooring
While local codes may dictate how your walk-in refrigerator or freezer is built, the ideal setup is to have an insulated floor with quarry tile and grout installed above an insulated concrete slab and topped with a thermal break. By itself, concrete does not provide adequate insulation. The concrete must be insulated to make sure that the interior reaches temperatures below 37° F and stays there.
It may be tempting to buy a walk-in with no floor and simply have it installed over a finished floor because of the lower expenses. However, the cost of utilities could cut you back significantly. In fact, if you’re purchasing a walk-in freezer, an insulated floor is an absolute must because the extremely low temperatures can crack the floor. Having a properly insulated floor allows you to cut back on your energy costs by around 15%.
If you plan to load your walk-in with heavy carts and shelves, reinforced or structural floors will add extra strength to accommodate the additional load. If your walk-in has floor panels, consider adding interior or exterior floor ramps to allow easier access to your refrigerated items. If your walk-in is located outside the building, an insulated floor is essential to keep water, insects, and pests from squeezing through minuscule cracks.
Other options you have include placing insulation under concrete then installing the walk-in on top where the floor can be tiled. You may also install commercial vinyl flooring into the walk-in, but be sure that the edges and corners of the floor are rounded to comply with NSF standards. Make sure the unit is placed on a flat, level surface so you can achieve square seams and a tight door that keeps hot air out. If the floor isn't flat, the panels will not align properly and will create air leaks that reduce the efficiency of the unit.
Insulating the floor is even more crucial if you plan to install your walk-in refrigerator or freezer in a basement or crawl space or if the unit will be elevated, such as in a deck or trailer. Floor insulation will protect your walk-in from the heat circulating directly below the unit.
3. Finishes
a. Galvalume
Galvalume is a galvanized steel that is coated with a layer of aluminum. This is the most common finish for walk-ins because it is not as prone to rusting and corrosion as plain galvanized steel. It is also tougher, more durable, and more dent-resistant than aluminum. Galvalume typically comes with a minimum thickness of 26 gauge.
b. Galvanized steel
 Galvanized steel is not as durable as galvalume and can be prone to developing rust as it is exposed to moisture. The minimum galvanizing for walk-in refrigerators and freezers is G90, which is strong and more dent-resistant than aluminum. Galvanized steel usually has a minimum thickness of 26 gauge for walls and ceilings and 16 to 20 gauge for floors. Walk-ins with a galvanized steel finish are required by the NSF to install quarry tile over the floor.
c. Painted Galvanized
Painted galvanized costs more than galvalume, but it is also more corrosion-resistant because of the extra coat of paint that adds protection against rusting. It also allows you to customize your unit with different color options.
d. Aluminum
Aluminum is not as corrosion-resistant as other materials. It also needs to be thicker to provide adequate strength. It usually needs to be 40 mm to 60 mm in thickness for the walls and ceilings and 100 to 120 mm for the floor. Some walk-ins have 1/8” aluminum floors with diamond tread-plate embossing to add extra strength.
e. Stainless Steel
Stainless steel is the strongest and least corrosive of all finishing materials, making it appropriate for areas with high foot traffic. It is also the most expensive.
4. Assembly
a. Pre-assembled
A pre-assembled walk-in unit arrives on-site shipped on a gooseneck truck. Depending on the size of the unit, it can be lifted out of the truck using a crane, a forklift, or a boom lift. Delivery and installation of pre-assembled walk-in causes a major disruption to your operations. It is best to have a pre-assembled unit delivered during slow days or if your establishment is still being constructed.
You also want to consider the building’s doorways and hallways to make sure that the pre-assembled walk-in will fit through them. You may find that you need to go for smaller walk-in units if the doorways are not large enough to accommodate them. Or you may opt to have the walk-in installed outdoors instead.
b. Assembled On-Site
On-site assembly is more expensive, but it may be necessary if the size of walk-in you need to ensure smooth operations does not fit through the door. This type of assembly is ideal for restaurants that need large walk-ins to store their refrigerated items.
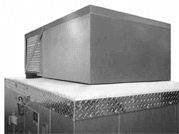
5. Refrigeration System
Walk-ins are available with split systems and self-contained refrigeration systems.
a. Split System
 Split systems are essentially remote refrigeration systems where the condensing unit is installed on the roof of the walk-in box, a separate room or outside the building, typically on the rooftop. This allows heat to stay outside instead of heating up the kitchen. Remote walk-ins are mostly delivered pre-assembled, although units that are assembled on site may also have remote systems. These are great options for facilities with low ceilings.
There are remote walk-ins that ship unassembled. While this type of walk-in is generally less expensive, installation can get laborious and complicated. You’ll have to get some professional assistance in assembling the walk-in and the refrigeration system as well pumping the unit with the freon to start it up.
Additionally, you will need to invest in protective housings to weather-proof remote condensers or else your condenser unit will freeze up when it gets too cold outside.
b. Self-Contained System
Self-contained systems come with their components, refrigeration lines, and drainage system completely installed.
 Standard top-mount and side-mount self-contained units have the evaporator coil on an interior sidewall or ceiling, which means it will take up some storage space.
Drop-in units eliminate this problem by packing the evaporator coil together with the compressor and condenser in a single frame interconnected with pre-charged refrigeration lines. This frame, often referred to as the “capsule pack,” is mounted on the roof of the walk-in. This setup does not have the evaporator coil dangling from the ceiling of the unit, allowing you to use 100% of the space inside the unit. This also makes the walk-in cooler or freezer much more energy-efficient compared to standard top-mount or side-mount units.
More importantly, installing this refrigeration system typically doesn't require a refrigeration technician. With much of the evaporator contained inside the capsule pack pre-assembled, you will only need to lift it to the top and bolt into place, making installation so much easier.
 Capsule packs also come in side-mount self-contained configurations for those with low ceilings. The evaporator coil in this system still takes a bit of interior space, but it isn’t as drastic as the conventional side-mounted units. Unlike drop-ins, however, side-mount capsule packs might have to be hardwired by a professional.
Keep in mind that a capsule pack still needs room. Depending on the size, you will have to dedicate around 2' x 3' with additional breathing space around the system for good ventilation.
Self-contained walk-ins breathe hot air into the interior. If you don’t have an adequate HVAC system, the additional heat that the unit brings could increase your cooling costs.
6. Door
Convex Hinged Door vs. Flush Door (left and right hand open)
A walk-in’s door is the most used and abused part of the unit. The door provides the important function of providing access to staff while preventing the cold air inside from escaping. Therefore, the walk-in’s door must be built to be able to withstand frequent use.
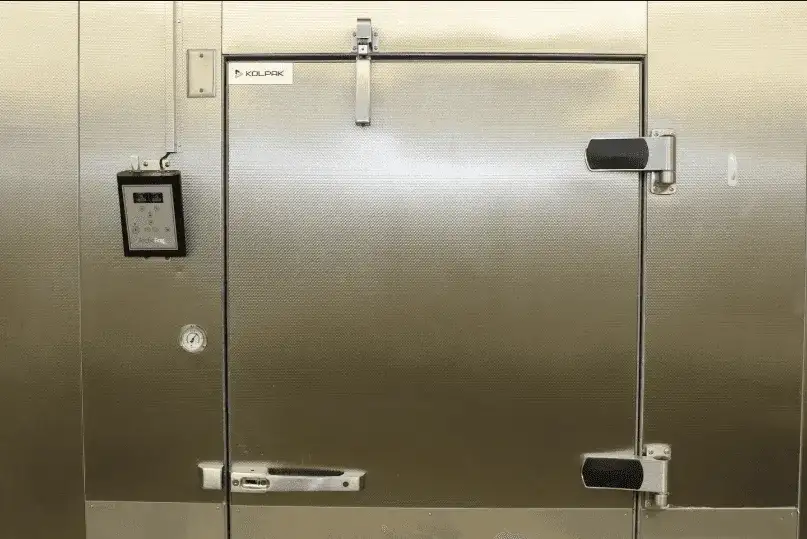
A durable door must have a stainless steel front and a kick plate to absorb some of the impacts the door will encounter. This will also protect it from scratching, chipping, or denting. Ckitchen includes a kick plate for free with your purchase.
Rigid, reinforced door frames and heavy-duty or industry-grade hinges and latches provide maximum durability. Loose hinges can create air gaps that allow hot air to seep inside and compromise energy efficiency. The door must also have well-fitting gaskets to prevent cold air from leaking out. Inside door releases are also a standard safety feature that operators can specify as a push-bar for hands-free operation.
Swing-out doors in widths of 24 to 34 inch are available and may be left- or right-hinged. Sliding doors are also available for walk-ins.
Consider looking for a walk-in refrigerator or freezer with self-closing doors as well. This ensures that the door is always closed even when the staff has their hands full.
Some doors also have a small glass window that allows you to peer inside. Another feature you may want to invest in is a door lock to give an extra layer of protection for your food stocks during after-hours. Deadbolt locking handles are standard on many models.
7. A/C Size
Units come in many different shapes and sizes, and the air conditioner that you hook up can differ as well. This sizing chart can help you determine your A/C needs:
| Dimensions of the Walk-In Cooler | Size of Air-Conditioner |
| 6' x 8' | 10,000 BTU |
| 8' x 8' | 12,000 BTU |
| 8' x 10' | 15,000 BTU |
| 8' x 12' | 18,000 BTU |
| 10' x 14' | 24,000 BTU |
The Walk-in Refrigerator or Freezer For Your Needs
1. Types of Food to Store

The first thing you need to consider is the type of food you plan to store in your walk-in. Refrigerators have a temperature range of 35° F to 41° F. They can keep food items cold but not frozen. For the latter, you need to invest in a freezer, which can hold temperatures of 0° F and below for storing raw meats and other frozen goods. A walk-in freezer looks very similar to a walk-in refrigerator. The only noticeable difference is the walk-in freezer has thicker panels and a more powerful refrigeration system to maintain the extremely low temperatures.
It is advised to designate separate sections of a walk-in for raw and ready-to-eat products. This will minimize the chances of cross-contamination. Place at least one accurate thermometer in the warmest part of the walk-in cooler to measure the air temperature. Keep shelves at least 6 inch off the floor for ease of cleaning.
2. Capacity
Walk-in refrigerators and freezers are much larger than reach-ins. The smallest units, sometimes called step-in units, typically occupy 15 cu. ft. while the customizable walk-ins can go as large as 400,000 sq. ft. A useful way to measure how big of a walk-in you need is to look at how much food you need to store. The rule of thumb is every 1 sq. ft. of storage space can fit approximately 28 lbs. of solid food. If you have 50 lbs. of chicken to store, you’ll need to set aside around 1.8 cu. ft. of space in your walk-in for that.
Keep in mind that not every sq. ft. of the interior will be available for use. You will need to account for airflow, aisle space, shelving, and rack configuration as well. If you plan on bringing in a cart for loading bulk items, you will need to leave 40 inches of aisle space open to accommodate the cart. All in all, you will have about 60% to 70% of the interior space to use.
3. Installation
A walk-in refrigerator or freezer will definitely cause some disturbance upon installation so it’s best to be prepared. If you already have an existing business, the installation could disrupt operations and inconvenience your customers. The best time to schedule the installation is when your establishment is closed.
a. Indoor Installation
If you plan to have the walk-in installed indoors, keep in mind that the unit will take up a lot of interior space. If you’re installing a walk-in into an existing establishment, your choices are limited by the size of the space you already have. Self-contained indoor walk-ins will also generate a lot of extra heat to power up the refrigeration system, which will cause strain on your HVAC system and create discomfort for your staff and customers. If your restaurant is situated in a hot and humid environment, this may not be the best option.
b. Outdoor Installation
A walk-in refrigerator or freezer installed outdoors doesn’t take up a lot of precious interior real estate. Installation is also quicker if done outdoors because it eliminates the need to figure out how to work around the existing interior space. Unlike an indoor walk-in, outdoor units do not release extra heat into the building. It also makes receiving food deliveries very convenient since staff can quickly load the receivables straight into the walk-in from the receiving area.
However, there are also some special considerations for an outdoor installation. An outdoor walk-in must be built specifically to withstand sun, wind, rain, and the occasional curious animal. Even with sturdier construction, they need to have a rain roof that diverts rainwater and prevents it from seeping into the walk-in.
You also need a winterizing kit to ensure the walk-in functions properly even during the winter. A winterizing kit normally includes a compressor cover and an interior heater to keep the interior temperature above 32° F and prevent its contents from freezing over during the winter.
Also, check with your local health and safety boards if they have additional regulations for the use of maintenance of outdoor walk-ins. Some localities may require special components to be installed in units that are used in hot, humid environments.
4. Ventilation
Self-contained walk-ins require an adequate amount of space for air to circulate around the unit. Poor ventilation means there is no room for hot air to flow away from the unit, and so that the compressor is forced to draw in hotter air and work harder.
The ambient temperature around the compressor should be no more than 80° F. Provide at least 8” to 10” of space around the top, back, and sides of your unit. This ensures plenty of fresh air is available for the compressor. If the indoor temperature is too high and there is no way to bring ample ventilation, remoting the compressor outdoors should be considered.
5. Ease of Use

A walk-in refrigerator or freezer is an expensive investment so you want your kitchen staff to be able to make the most of it. Walk-ins must be quick and easy to program and need an easy-to-read temperature display to help you monitor the interior temperature regularly. Door operation must also be smooth and simple. A lot of precious food prep time can be wasted by a walk-in door that takes too much time or effort to open and close.
6. Energy Consumption
Walk-ins consume a lot of energy, especially so when they are not installed and maintained properly. Small 5' x 6' walk-ins typically include a 1/2 hp compressor when used as a cooler and should be able to maintain a 35° F (or below) box temperature. When used as a freezer, walk-ins should have a 1 hp compressor and be able to maintain as low as -10° F box temperature. These compressors will generally run on 115/60/1 voltage. Larger units generally require proportionally larger compressors and may use 208/220V/1 or 3 phase.
Choosing a unit with high-density, foamed-in-place polyurethane insulation can help it run more efficiently. The walls, the ceiling, and the floor must be fully insulated, with thermal breaks for the floor under each wall to eliminate air leaks. A well-organized layout for the racks and shelves can also provide for effective airflow.
The LED lighting is also preferred for an energy-efficient walk-in. LED bulbs use up to 90% less energy than incandescent bulbs and emit far less heat than fluorescent bulbs. They do not need to heat up to reach their full brightness and are safer for food items because they do not contain mercury.
Regular maintenance must also be observed. Make sure to create a cleaning schedule for staff to ensure the walk-in and its components are in good shape. Cleaning and maintenance tasks involve keeping the door in good condition by removing dirt and debris and replacing the gaskets when you start to see signs of wear and tear. The condenser coils must also be kept free of dust that can clog up the coils and put extra strain on the system.
7. Maintenance Requirements
Outer construction of stainless steel is the most durable and easiest to maintain. Aluminum outer construction is cheaper, but dents easily and is more difficult to clean. A compromise may be Galvalume coated sheet metal which is stronger than aluminum but has a rust resistant coating (enamel coatings are available as well but not as prevalent). Compressor/condenser units should be in easily accessible areas, and multiple remote units should be grouped together to ease maintenance and servicing. Preventative maintenance for walk-in refrigeration systems involves ensuring proper airflow and ventilation areas and routine cleaning of condenser coils by a certified technician.
8. Accessories
a. Strip Curtains
Strip curtains are overlapping strips of clear or tinted PVC that are hung over the door to provide an extra barrier to keep the cold air inside and hot air and insects from coming in. These are particularly useful if you need to keep the door open for long periods of time, such as when wheeling in bulk ingredients on a cart during weekly or monthly deliveries.
b. Supplemental Air Circulation System
An air circulation system that allows a walk-in to draw in cold outside air when the exterior temperature is colder than the interior box temperature is available to supplement a unit's compressor. Another option is a pressure relief valve designed to eliminate the slight vacuum created when warmer air enters a walk-in freezer and expands when the door is closed, which can make it difficult for staff to open a unit.
c. Ramps
Ramps are useful for rolling in carts into the interior of the walk-in unit.
d. Shelves
Shelves allow you to organize your refrigerated items more efficiently. Look for epoxy-coated wire shelves. These are more durable and are not prone to rust or water damage. Shelves must be installed at least 6” off the floor.
e. Thermometers
Thermometers allow you to keep an eye on the interior temperature of your walk-in. You may also want to place multiple thermometers in strategic areas of the interior to make sure that the safe and constant temperatures are maintained all throughout the interior.
Another option is to use a data logger. A data logger automatically records the temperature and humidity levels of your walk-in at programmed time intervals. The device then organizes the data into a spreadsheet that can be accessed online and downloaded to your computer and then submitted to a health inspector. This is an accurate and convenient way to log your walk-ins data as opposed to error-prone manual logging done by human employees.
f. Alarm Systems
New models of walk-in refrigerators and freezers may come with alarm systems that notify you when something goes out of hand. For example, if the door is left open for a long period of time, the alarm will sound to let you know it needs to be closed. The unit may also have an alarm for when it detects a sudden rise in temperature. Some of the more high-end units can even call you on your phone or send you a text to let you know if something goes awry.
g. Non-Skid Tape
The floor of a walk-in unit can get slippery but you can easily remedy this by using non-skid tape to prevent staff from slipping on the floor.